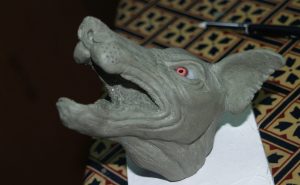
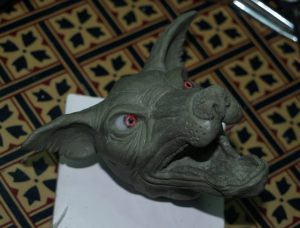
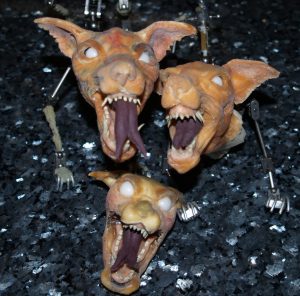
I was not happy with the original version of the Hounds of Hell. It was much too hairy and cuddly-looking, so we nicknamed it Fluffy and I sculpted another head. The original is now the Puppy of Hell, and the parents were created from a single mould, with one of them having a narrower armature and a slightly different shape jaw. I also painted one darker than the other and gave them both a bad case of mange. Oh, and some silicone tongues!
The way the head was cast was first to cast the inside of the mouth. I used soft water clay to create the walls around the edge of the mouth area, then filled it all with plaster. Then a section was made for the head and upper jaw and the front of the ears. The eyeballs were in place, with holes to hold a loop of wire that gets embedded in the plaster. This leaves just a short protruding length to locate the eyeball in the mould again when making the final piece. The third section was the lower jaw, and finally the back of the ears and head. At all times it is important to bear in mind how each section will come apart from its neighbouring mould piece.
When making the heads inside the mould, I first slush moulded with liquid latex, painting where necessary to ensure all parts were coated. At this stage the back of the head remains a separate piece altogether, and is only put in position after the armature and foam are done inside the head. After building the latex up to an acceptable thickness, I added the plastic armature using Polymorph and wire where I wanted e.g. the nose to be moveable. I filled the gaps inside the head using some Flex Foam, a soft 2 part Smooth-On polyurethane foam. Then I added the ball-and-socket joints for the jaw, using more polymorph where necessary to give it a firm location. Lastly the back of the ears and head go on, sticking the latex edges together where possible, and then filling with a final small pour of Flex Foam. After demoulding some of the latex edges were not so good, but it is an easy job to add more latex and build them up or stipple over as needed.
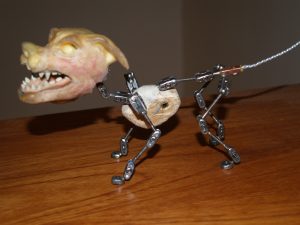
I tried hard to make some eyeballs that looked right, but in the end just painted the empty sockets black, which seems more nasty. The upper and lower gums and teeth are all made from polymer clay and glued into place. Skin is latex. Armatures all ball-and-socket using Animation Toolkit joints and bespoke chest and hip sections. Feet are steel, tapped for tie-downs. I used Polymorph to bulk out the bones.
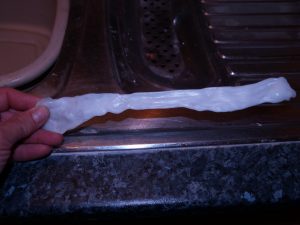
A great tip for using Polymorph, which I got from Bluworm – have a look at his videos on YouTube: The standard way to melt Polymorph is to put it into very hot water, but this makes it very tricky to use in the delicate way needed for stopmo. So, just melt a quantity of Polymorph, then get it out of the water and spread it on the edge of a stainless steel sink to make a strip of it. When it has cooled and gone white, you can easily peel it off, then use it by just heating with a hot air gun for a few seconds, and pull off whatever quantities you need. Make sure to have a bowl of water to wet your fingers in when handling the stuff or it will stick and may burn you. When covering a threaded rod ‘bone’ I add a rough quantity of polymorph, shape it a bit and make sure it grips the rod, then if needed I give it another quick blast with the hot air gun and can then pinch off any excess to get exactly the right amount in place.
By the way, the reeds in the final photo are wire twist ties for plastic bags. You can buy paper-covered ones in large quantities on eBay. These were originally beige-coloured. I had to trim them to shape with a scalpel, and found the easiest way to do this was first to stick them onto a piece of sellotape (which gets fastened onto a block of wood on set). The wires hold the reeds very nicely in shape.
