Here is a sculpted puppet (in Chavant hard clay, with the armature inside) ready for casting the first half of a two-part plaster mould. It is in a bed of water clay, with some round indents to help the mould halves register accurately together. I have used some heavy gauge plastic (actually builder’s damp-proof course) to create the walls, backed up with some big chunks of water clay. It is essential to make sure all the gaps are sealed, or you could have plaster running all over the worktop and floor!
For this puppet I have also used a piece of perspex as the base, and screwed the feet to it. I usually try to use as little release agent as possible, so a quick spray with a standard release is all that it gets before pouring the plaster.
I use Crystacal R plaster, or dental stone as it is often called. There are many types of plaster, but the one to use is a hard moulding plaster with very little expansion, e.g. Hydrocal, Ultracal etc. Plaster of Paris is completely unsuitable for this sort of mould-making. Mix by adding dry plaster into a bowl of clean water, always bearing in mind that you need about three times as much plaster than water – so if you fill the bowl one-third full with water, you will end up with a completely full bowl of mixed plaster! I pour in enough to make a raised island of plaster. Ideally leave it all a couple of minutes to absorb the water before mixing to a thick creamy consistency. Brush the plaster carefully into all the crevices, to release any trapped air bubbles, and remember to put the brush in water and clean it before the plaster sets! Once the sculpt is all covered, pour in the plaster to a depth of about 20 to 25mm, then add some fibres – burlap, hessian (slightly damp) or glass fibres – before putting a final layer of plaster over the top. Tapping the table or the mould can help encourage air to rise, but it can also cause the walls to come adrift, so only do it if you have confidence in the mould not falling apart! The reason for putting a generous amount of plaster into your mould before adding fibres is so they do not reach down to the important bit – the surface against the sculpt.
Once the first half of the mould is done, remove the water-clay bed without disturbing your sculpted surface. Wash off any tiny residue. Then I make some overflow channels by placing some water-clay pieces, about 6mm thick, onto the bare plaster. These help to reduce the surface area of the mould where it mates together, enabling you to get greater pressure on the seams when clamping. You also need a few bits of clay at the edge of the mould, to create some little spaces where a screwdriver c an be inserted to pry open the mould. Make sure the registration keys are left clear.
The final bit of preparation for the second half of the mould is to brush on a slip of very runny clay all over the exposed plaster. You can usually tell when you have covered all the areas because uncovered plaster is brilliant white. Don’t be tempted to use Vaseline, as it tend to leave streaks from your fingerprints or brush. A last spray of release agent, and we are done apart from building up the walls again, and sealing around the edges. I do this fairly crudely using a thin sausage of water clay pressed all around the perimeter. You can see I have also used Lego bricks for walls in one mould – the principle is the same. But Lego has small gaps between bricks, into which plaster can migrate, so I give the Lego walls a generous coating of Vaseline before use. Incidentally, Lego is perfect for small moulds for heads, arms, legs etc.
You can tell when plaster is set by a couple of signs. First, it will have gone hot, then cooled off. Second, a bit of plaster left over in the bowl will crack rather than crumble. Remember, this is a chemical reaction, a setting process, not drying. And one important tip: leave any unused plaster to set off in the bowl. By all means add water to weaken it, but DO NOT under any circumstances pour liquid plaster down your sink. It will block the plumbing and could be very expensive to put right. Just shove it to one side in a bowl and crack it out later for disposal.
I then check the fit of the armature inside the mould and prepare for pouring the silicone. My usual method is to brush a layer of silicone into the mould and over the armature (which has been covered in physio wrap and/or PTFE tape), wait until it is set, then po ur some silicone generously into the mould, place the armature, pour some more into the second half and put them together quickly. You need to overfill the mould a bit for this, and it is a good idea to retard the silicone a little, and even thin it if it doesn’t flow, so it can allow air bubbles to escape upwards. Colouring the silicone should have been done in advance, all the colour into one part (Part B usually). Really good silicone flesh tones can be bought from prosthetics suppliers (Neill’s Materials in the UK, for instance).
In the last but one picture I show a mould clamped in a bench vice. Portable clamps are also good. The great thing about a bench vice is that you have both hands free. You only need to clamp it enough to give thin seams – plaster does not compress, but it will crack under excessive pressure! You can see that the soles of the feet are visible, and air can escape through this route. Air travelling upwards through the arms cannot escape unless you have made some escape channels in the mould. Some people do this by laying Vaselined cocktail sticks on the first half of the mould, so there is just a tiny point where the sculpt is compromised by the channel. I find that if I have put enough silicone into the arms there is usually enough to give a complete fill.
The super professional way of filling a mould is to pour or inject silicone so it enters the mould at the bottom and drives the air out the top. Imagine a tube running down inside the mould, connecting to the top of the head (which is the lowest point). Silicone poured down this tube will fill up the mould perfectly and drive all the air up and out through the high points. BUT you need to ensure that every single high point – tips of all the fingers, for instance – has a vent, and you need to be able to block these up once the silicone starts flowing out of them, or it will only fill the mould as high as the lowest vent hole, and you’ll be scraping silicone off the floor!
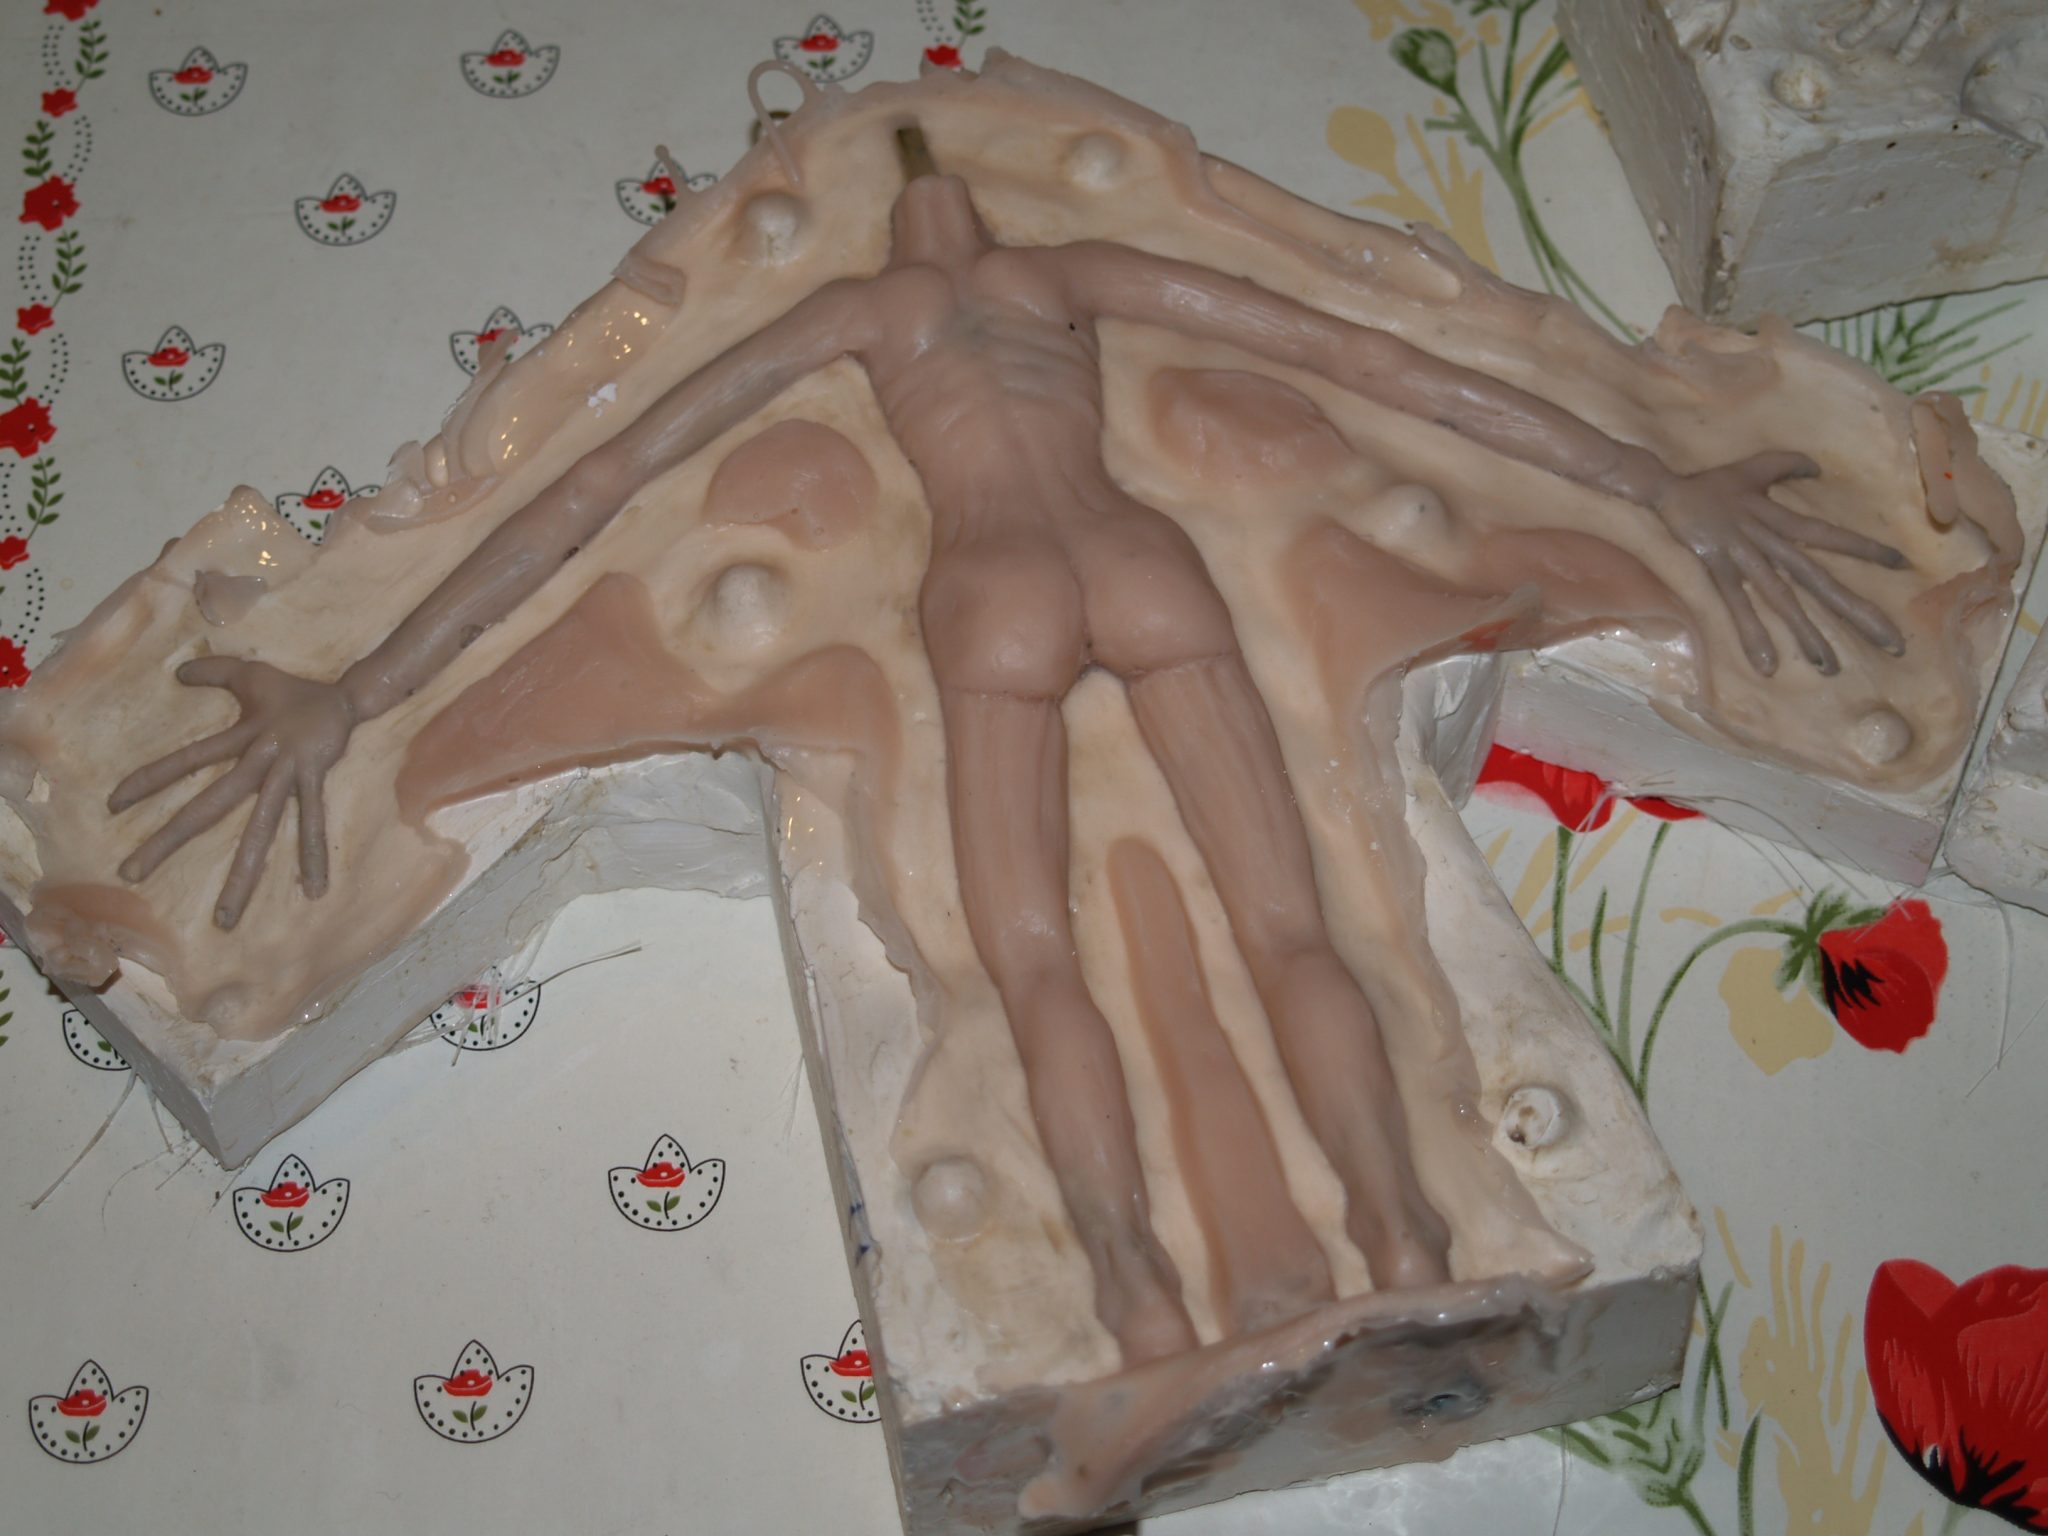
Final picture shows the finished puppet just about to be released from the mould.