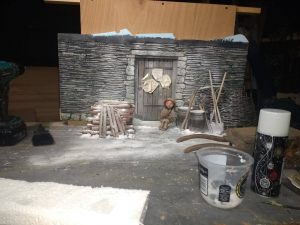
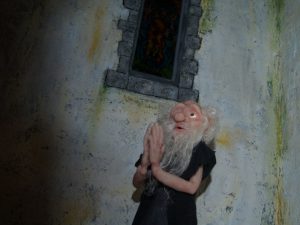
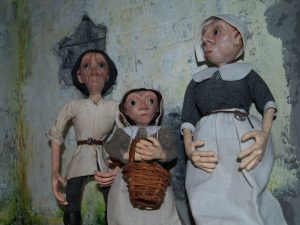
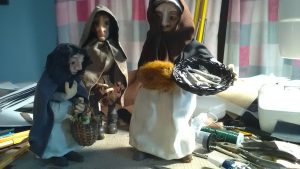
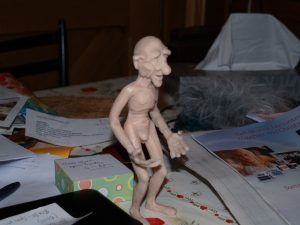
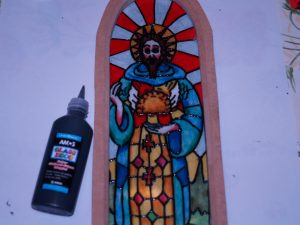
Here’s a couple of stills of the little Orphan begging in the doorway…and a timelapse of the initial set-up. Still to be added to this scene are the passers-by in the foreground, one pushing the cart, and two little rats who come sniffing about.
Two part Plaster Moulds
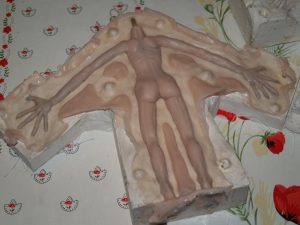
Here is a sculpted puppet (in Chavant hard clay, with the armature inside) ready for casting the first half of a two-part plaster mould. It is in a bed of water clay, with some round indents to help the mould halves register accurately together. I have used some heavy gauge plastic (actually builder’s damp-proof course) to create the walls, backed up with some big chunks of water clay. It is essential to make sure all the gaps are sealed, or you could have plaster running all over the worktop and floor!
For this puppet I have also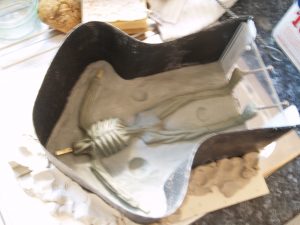
I use Crystacal R plaster, or dental stone as it is often called. There are many types of plaster, but the one to use is a hard moulding plaster with very little expansion, e.g. Hydrocal, Ultracal etc. Plaster of Paris is completely unsuitable for this sort of mould-making. Mix by adding dry plaster into a bowl of clean water, always bearing in mind that you need about three times as much plaster than water – so if you fill the bowl one-third full with water, you will end up with a completely full bowl of mixed plaster! I pour in enough to make a raised island of plaster. Ideally leave it all a couple of minutes to absorb the water before mixing to a thick creamy consistency. Brush the plaster carefully into all the crevices, to release any trapped air bubbles, and remember to put the brush in water and clean it before the plaster sets! Once the sculpt is all covered, pour in the plaster to a depth of about 20 to 25mm, then add some fibres – burlap, hessian (slightly damp) or glass fibres – before putting a final layer of plaster over the top. Tapping the table or the mould can help encourage air to rise, but it can also cause the walls to come adrift, so only do it if you have confidence in the mould not falling apart! The reason for putting a generous amount of plaster into your mould before adding fibres is so they do not reach down to the important bit – the surface against the sculpt.
Once the first half of the mould is done, remove the water-clay bed without disturbing your sculpted surface. Wash off any tiny residue. Then I make some overflow channels by placing some water-clay pieces, about 6mm thick, onto the bare plaster. These help to reduce the surface area of the mould where it mates together, enabling you to get greater pressure on the seams when clamping. You also need a few bits of clay at the edge of the mould, to create some little spaces where a screwdriver c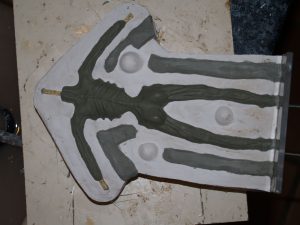
The final bit of preparation for the second half of the mould is to brush on a slip of very runny clay all over the exposed plaster. You can usually tell when you have covered all the areas because uncovered plaster is brilliant white. Don’t be tempted to use Vaseline, as it tend to leave streaks from your fingerprints or brush. A last spray of release agent, and we are done apart from building up the walls again, and sealing around the edges. I do this fairly crudely using a thin sausage of water clay pressed all around the perimeter. You can see I have also used Lego bricks for walls in one mould – the principle is the same. But Lego has small gaps between bricks, into which plaster can migrate, so I give the Lego walls a generous coating of Vaseline before use. Incidentally, Lego is perfect for small moulds for heads, arms, legs etc.
You can tell when plaster is set by a couple of signs. First, it will have gone hot, then cooled off. Second, a bit of plaster left over in the bowl will crack rather than crumble. Remember, this is a chemical reaction, a setting process, not drying. And one important tip: leave any unused plaster to set off in the bowl. By all means add water to weaken it, but DO NOT under any circumstances pour liquid plaster down your sink. It will block the plumbing and could be very expensive to put right. Just shove it to one side in a bowl and crack it out later for disposal.
I then check the fit of the armature inside the mould and prepare for pouring the silicone. My usual method is to brush a layer of silicone into the mould and over the armature (which has been covered in physio wrap and/or PTFE tape), wait until it is set, then po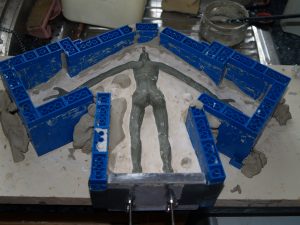
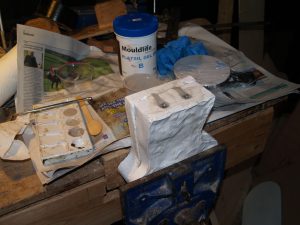
In the last but one picture I show a mould clamped in a bench vice. Portable clamps are also good. The great thing about a bench vice is that you have both hands free. You only need to clamp it enough to give thin seams – plaster does not compress, but it will crack under excessive pressure! You can see that the soles of the feet are visible, and air can escape through this route. Air travelling upwards through the arms cannot escape unless you have made some escape channels in the mould. Some people do this by laying Vaselined cocktail sticks on the first half of the mould, so there is just a tiny point where the sculpt is compromised by the channel. I find that if I have put enough silicone into the arms there is usually enough to give a complete fill.
The super professional way of filling a mould is to pour or inject silicone so it enters the mould at the bottom and drives the air out the top. Imagine a tube running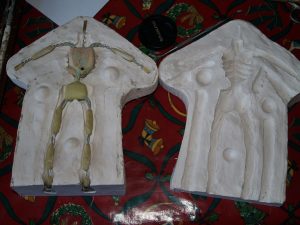
Final picture shows the finished puppet just about to be released from the mould.
Scarier Hounds!
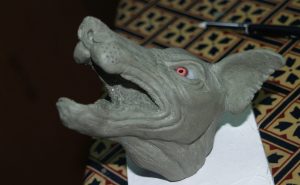
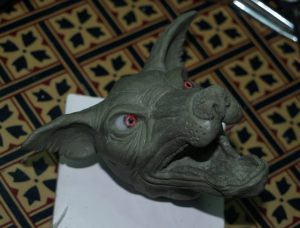
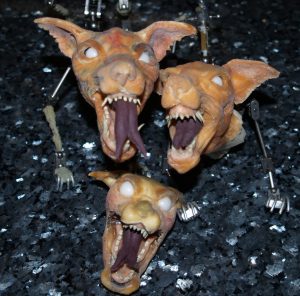
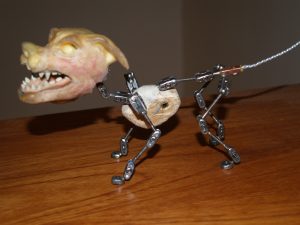
I was not happy with the original version of the Hounds of Hell. It was much too hairy and cuddly-looking, so we nicknamed it Fluffy and I sculpted another head. The original is now the Puppy of Hell, and the parents were created from a single mould, with one of them having a narrower armature and a slightly different shape jaw. I also painted one darker than the other and gave them both a bad case of mange. Oh, and some silicone tongues!
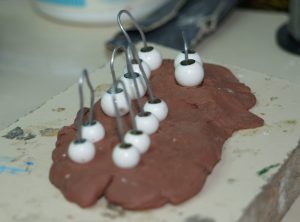
The way the head was cast was first to cast the inside of the mouth. I used soft water clay to create the walls around the edge of the mouth area, then filled it all with plaster. Then a section was made for the head and upper jaw and the front of the ears. The eyeballs were in place, with holes to hold a loop of wire that gets embedded in the plaster. This leaves just a short protruding length to locate the eyeball in the mould again when making the final piece. The third section was the lower jaw, and finally the back of the ears and head. At all times it is important to bear in mind how each section will come apart from its neighbouring mould piece.
When making the heads inside the mould, I first slush moulded with liquid latex, painting where necessary to ensure all parts were coated. At this stage the back of the head remains a separate piece altogether, and is only put in position after the armature and foam are done inside the head. After building the latex up to an acceptable thickness, I added the plastic armature using Polymorph and wire where I wanted e.g. the nose to be moveable. I filled the gaps inside the head using some Flex Foam, a soft 2 part Smooth-On polyurethane foam. Then I added the ball-and-socket joints for the jaw, using more polymorph where necessary to give it a firm location. Lastly the back of the ears and head go on, sticking the latex edges together where possible, and then filling with a final small pour of Flex Foam. After demoulding some of the latex edges were not so good, but it is an easy job to add more latex and build them up or stipple over as needed.
I tried hard to make some eyeballs that looked right, but in the end just painted the empty sockets black, which seems more nasty. The upper and lower gums and teeth are all made from polymer clay and glued into place. Skin is latex. Armatures all ball-and-socket using Animation Toolkit joints and bespoke chest and hip sections. Feet are steel, tapped for tie-downs. I used Polymorph to bulk out the bones.
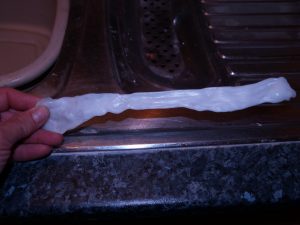
A great tip for using Polymorph, which I got from Bluworm – have a look at his videos on YouTube: The standard way to melt Polymorph is to put it into very hot water, but this makes it very tricky to use in the delicate way needed for stopmo. So, just melt a quantity of Polymorph, then get it out of the water and spread it on the edge of a stainless steel sink to make a strip of it. When it has cooled and gone white, you can easily peel it off, then use it by just heating with a hot air gun for a few seconds, and pull off whatever quantities you need. Make sure to have a bowl of water to wet your fingers in when handling the stuff or it will stick and may burn you. When covering a threaded rod ‘bone’ I add a rough quantity of polymorph, shape it a bit and make sure it grips the rod, then if needed I give it another quick blast with the hot air gun and can then pinch off any excess to get exactly the right amount in place.
By the way, the reeds in the final photo are wire twist ties for plastic bags. You can buy paper-covered ones in large quantities on eBay. These were originally beige-coloured. I had to trim them to shape with a scalpel, and found the easiest way to do this was first to stick them onto a piece of sellotape (which gets fastened onto a block of wood on set). The wires hold the reeds very nicely in shape.
Director’s Q&A
Q: What motivated you to do this project?
A: A number of things came together. I had tried stopmotion many years ago and given up because the technology available to me was simply not up to it. I remember costing out a film using a 16mm Bolex, and it came to a ridiculous sum. So I put it to one side and got on with writing and directing plays and working in television, sculpting and creating special make-up effects. Then in 2012 I directed a play, ‘Diamonds are for Trevor’ which required some Bond-type spoof effects – a car chase, explosions etc. Leon Cauchois was my cameraman for the shoot, and he had just completed a degree course in animation, so suggested we use stopmotion for the effects. Until this time I had not really caught up with the transformation that digital had brought to filmmaking – my head was still in the analogue world of rooms full of monitors and technicians. It was a complete revelation and set my head spinning with the possibility of a complete stopmotion film.
Q: Did you ever doubt your ability to do the film?
A: Of course, every day! But my skillset and background in film and TV fit very neatly with stopmotion.
Q: Why this story?
A: That came about by lucky chance as well! Colin Wilson wrote a folk opera many years ago on this very legend, and he suggested it would be just right for stopmotion. I was looking for the sort of story that would be engaging for all ages, and Tregeagle fitted perfectly. As I researched the story, it became clear that the fantastical elements had been added to a story about real people: Jan Tregeagle actually existed, he was a seventeenth-century magistrate and lawyer known for being very harsh, and he is buried in St Breoch’s churchyard, near Wadebridge. Church records state that his family gave money to restore the church. We also know that Bodmin was the headquarters in Cornwall for the Royalists in the Civil War. Once they were defeated, it is not hard to imagine a vindictive magistrate taking revenge on the impoverished people of the town. The fantastical elements of the story are a great morality tale – the wicked greedy man getting his come-uppance. And this being a Cornish tale, his punishment lasts until Judgment Day!
Q: You have changed the ending, haven’t you?
A: I have added a few elements of my own, while trying to preserve the legend intact. It was very important to me to make the story psychologically credible and to root it in the Cornish landscape and the period. It needs to feel right. For example there were hardly any roads at that time, which is why places like Bodmin were thought of as the wild west. So having Tregeagle carried over the moor in a sedan chair by his long-suffering servants seemed entirely appropriate.
Q: Does the film also have a message for modern audiences?
A: I certainly hope so! A morality story about greed and its consequences is really timeless. What is more difficult to convey to a modern audience is the belief structure of a bygone age. In those days people were absolutely convinced of the existence of the afterlife and of Hell. When Tregeagle suddenly realises that his eternal soul is in jeopardy, it strikes terror into his heart in a way that we find hard to comprehend. So that becomes a visual challenge for the filmmaker, one that I hope we have risen to. With stopmotion we have more scope than what we could achieve with live action.
Q: It all sounds quite scary. Does it also have some comedy?
A: There is no reason why stopmotion should not tackle serious themes. My earliest inspiration was Ray Harryhausen’s Jason and the Argonauts. I recall having nightmares about the scene with the skeleton warriors! But yes, this tale also has comic elements and the characters are sculpted as caricatures. Most of all, the arrogant and scary Jan Tregeagle is gradually reduced to a figure of pity – and then his nose drops off!
Q: You will have lived with this story for several years in making the film. Has your interest in it declined over that time?
A: Not at all, almost the opposite. I think a really good tale – and old legends are good just by virtue of their longevity – keeps throwing up new angles and ideas. It has been such a fascinating project that I would certainly contemplate doing another.
Foam helmets
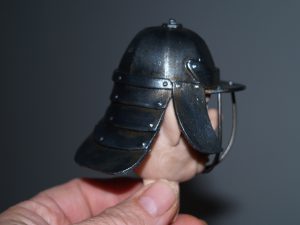
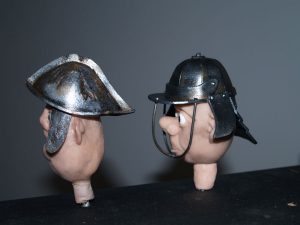
A couple of helmets made using 2mm EVA foam, glued with contact adhesive and painted with acrylics.
The shapes were first cut out in paper, then transferred to the foam. The pieces are glued using contact adhesive applied to both edges, then several layers of thinned PVA is painted on to fill the texture. Rivets are made from latex blobs applied with a cocktail stick. Finally painting is done with acrylics, using the silver as an applied sheen.
Moco Rig 9 – June 2017
Displayed and demonstrated the moco rig at the Riviera Film Festival in Torquay. Much interest from the public and other filmmakers, and from a college that is keen to construct their own. The rig performed faultlessly all day, taking a hyper lapse of the room.
Two adjustments still to make: adding a small weight to pull the Pan arm to one side to eliminate backlash; and getting to use Dragonframe’s Backlash Rollback button. This takes the axis beyond its zero position so that when it starts a move the backlash has already been taken up. I will try some tests to see how effective it is.
Eyeballs
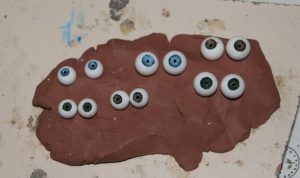
Have been making eyeballs, after trying the commercial ones and finding them not quite right.Either too brilliant white or translucent, and the ones with irises just look so exaggerated and fake! Ivory white Fastcast and micro painting, then some ultra clear Epoxy resin for the corneas. Very fiddly work! I have added some red flocking to the Fastcast to give the effect of blood vessels in the white of the eye. But they sink to the bottom, so I can have plain or very bloodshot eyes! Painting the irises is fiddly but the final result is worth it.
Method: Drill a 1.5mm hole into the eyeball, then using a large drill or countersink create a sunken iris to the right diameter. Easiest to do this by hand to get two the same. Then paint with acrylics, starting with the darkest colours, adding tiny flecks and details. Add black to the inside of the 1.5mm hole. When this is done, make the cornea by placing a few drops of water-clear epoxy on top. I placed a vaselined piece of wire in the hole before adding the epoxy, then extracted it once the epoxy was set. This leaves a hole for controlling the eye movement, but is rather visible, so perhaps there is a better way – either drilling the control hole at the side of the eye, or not having a hole at all and using something like a silicone wand or the eraser on the end of a pencil to move the eye.
Moco Rig 8 – April 2017
The whole rig is finally functioning as it should, having been upgraded with a very noisy NEMA 23 for the track function. The rotation works a treat, and all except for the focus are behaving well.
Focus seems to go walkabout rather alarmingly every so often, by which I mean it just chugs off in one direction without having been given any input. I am wary of it damaging a lens, so tend to disconnect it if this happens. Might even swap out the motor for another. May also gear it down even more, possibly the ideal would be a NEMA 11 geared motor for slowness and power.
I have also just purchased a track and the wherewithal to construct a small slider and pan/tilt/focus. This might employ the mechanism from the big rig, but may be better to start again with a new compact version.
Using melted Chavant clay
Progress has been made with puppet construction – now up to 30 separate characters – but things are very slow with costumes.
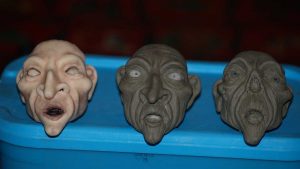
As many of my puppet heads are done in super Sculpey, I am starting to use a method for making some of them in silicone. This involves taking a silicone mould of the hardened sculpey, then pouring in melted Chavant clay to get a clay head that I can then re-sculpt a little before casting in plaster for the final piece in silicone. A quick way to create siblings! The detail quality is not great from the melted clay, but at least the proportions are accurate, and more sculpting can be done on top.
Will try the firmer grade of Sculpey to see if it is resilient enough to take a mould off it without baking it. It’s all to do with that golden rule: cast a flexible piece inside a solid mould and vice versa.
- Page 1 of 2
- 1
- 2
